3D Prototyping VR
ACADEMIC PROJECT • UX RESEARCH • VR PROTOTYPING
Make rapid prototyping tool more accessible
PROJECT TYPE
Virtual reality application design project
TARGET USER
Non-professionals in prototyping
DURATION
Oct 2022 - Present (Work in progress)
TEAM
My role: VR product design
Front-end engineering: Aaron Li
3D Modeling: Nian Tong
Project Mentor: J.D. Zamfirescu-Pereira
TOOLS
Unity, Blender, Figma
MY CONTRIBUTION
UX Research: Competitive Analysis, User Interviews, Affinity Maps, Persona Mapping, Journey Mapping, Empathy Maps
UX Design: Sketches, Wireframing, Usability Testing, High-fidelity prototyping
VR Design: Designing user interface and interaction in a 3D environment, 3D modeling

BACKGROUND
Overview
In my main course at UC Berkeley Electrical Engineering and Computer Science School, ‘Immersive Computing and Virtual Reality’, we created a rapid prototyping tool based on a VR platform for non-professionals. They can easily prototype from large to small products in the virtual space, using raw materials and tools. As a VR product designer, I worked with two master students and collaborated closely with a Ph.D. mentor.
My role
As a VR product designer, I independently work for conducting user interviews, synthesizing strategic insights, developing persona, journey mapping, ideation, wireframing, usability testing, iterating with user feedback, and prototyping 3D interface and user interaction in VR.
DEFINE
Problem statement
When people want to prototype their physical products, they’ll need a rapid prototyping process with small paper sketches or 3D CAD (computer-aided design) software to test a product's real size and volume to evaluate ergonomics, aesthetic form, and overall size.
However, there are some usability and accessibility frustrations in prototyping experiences for tangible products, such as no real visibility of the product’s perspective and scale. Paper sketching lacks accuracy and CAD software requires cost for learning and time-consuming process for people who don’t have enough experience with it.

Enable non-professionals to prototype tangible products easier?”
HOW MIGHT WE…
IMPLEMENT
Solution
FPO
DESIGN PROCESS

DISCOVERY
Research strategy
I conducted research in two steps — a competitive audit where I analyzed existing prototype tools, compared existing solutions, and explored critical components in rapid prototyping.
Next, I conducted 7 in-depth user interviews where I focused on finding problem space, users’ needs, and understanding their prototyping experiences.
Then I synthesized all of the data into an affinity map that helped to map out user pain points and build personas, empathy maps, journey maps, and design solutions.


Analysis
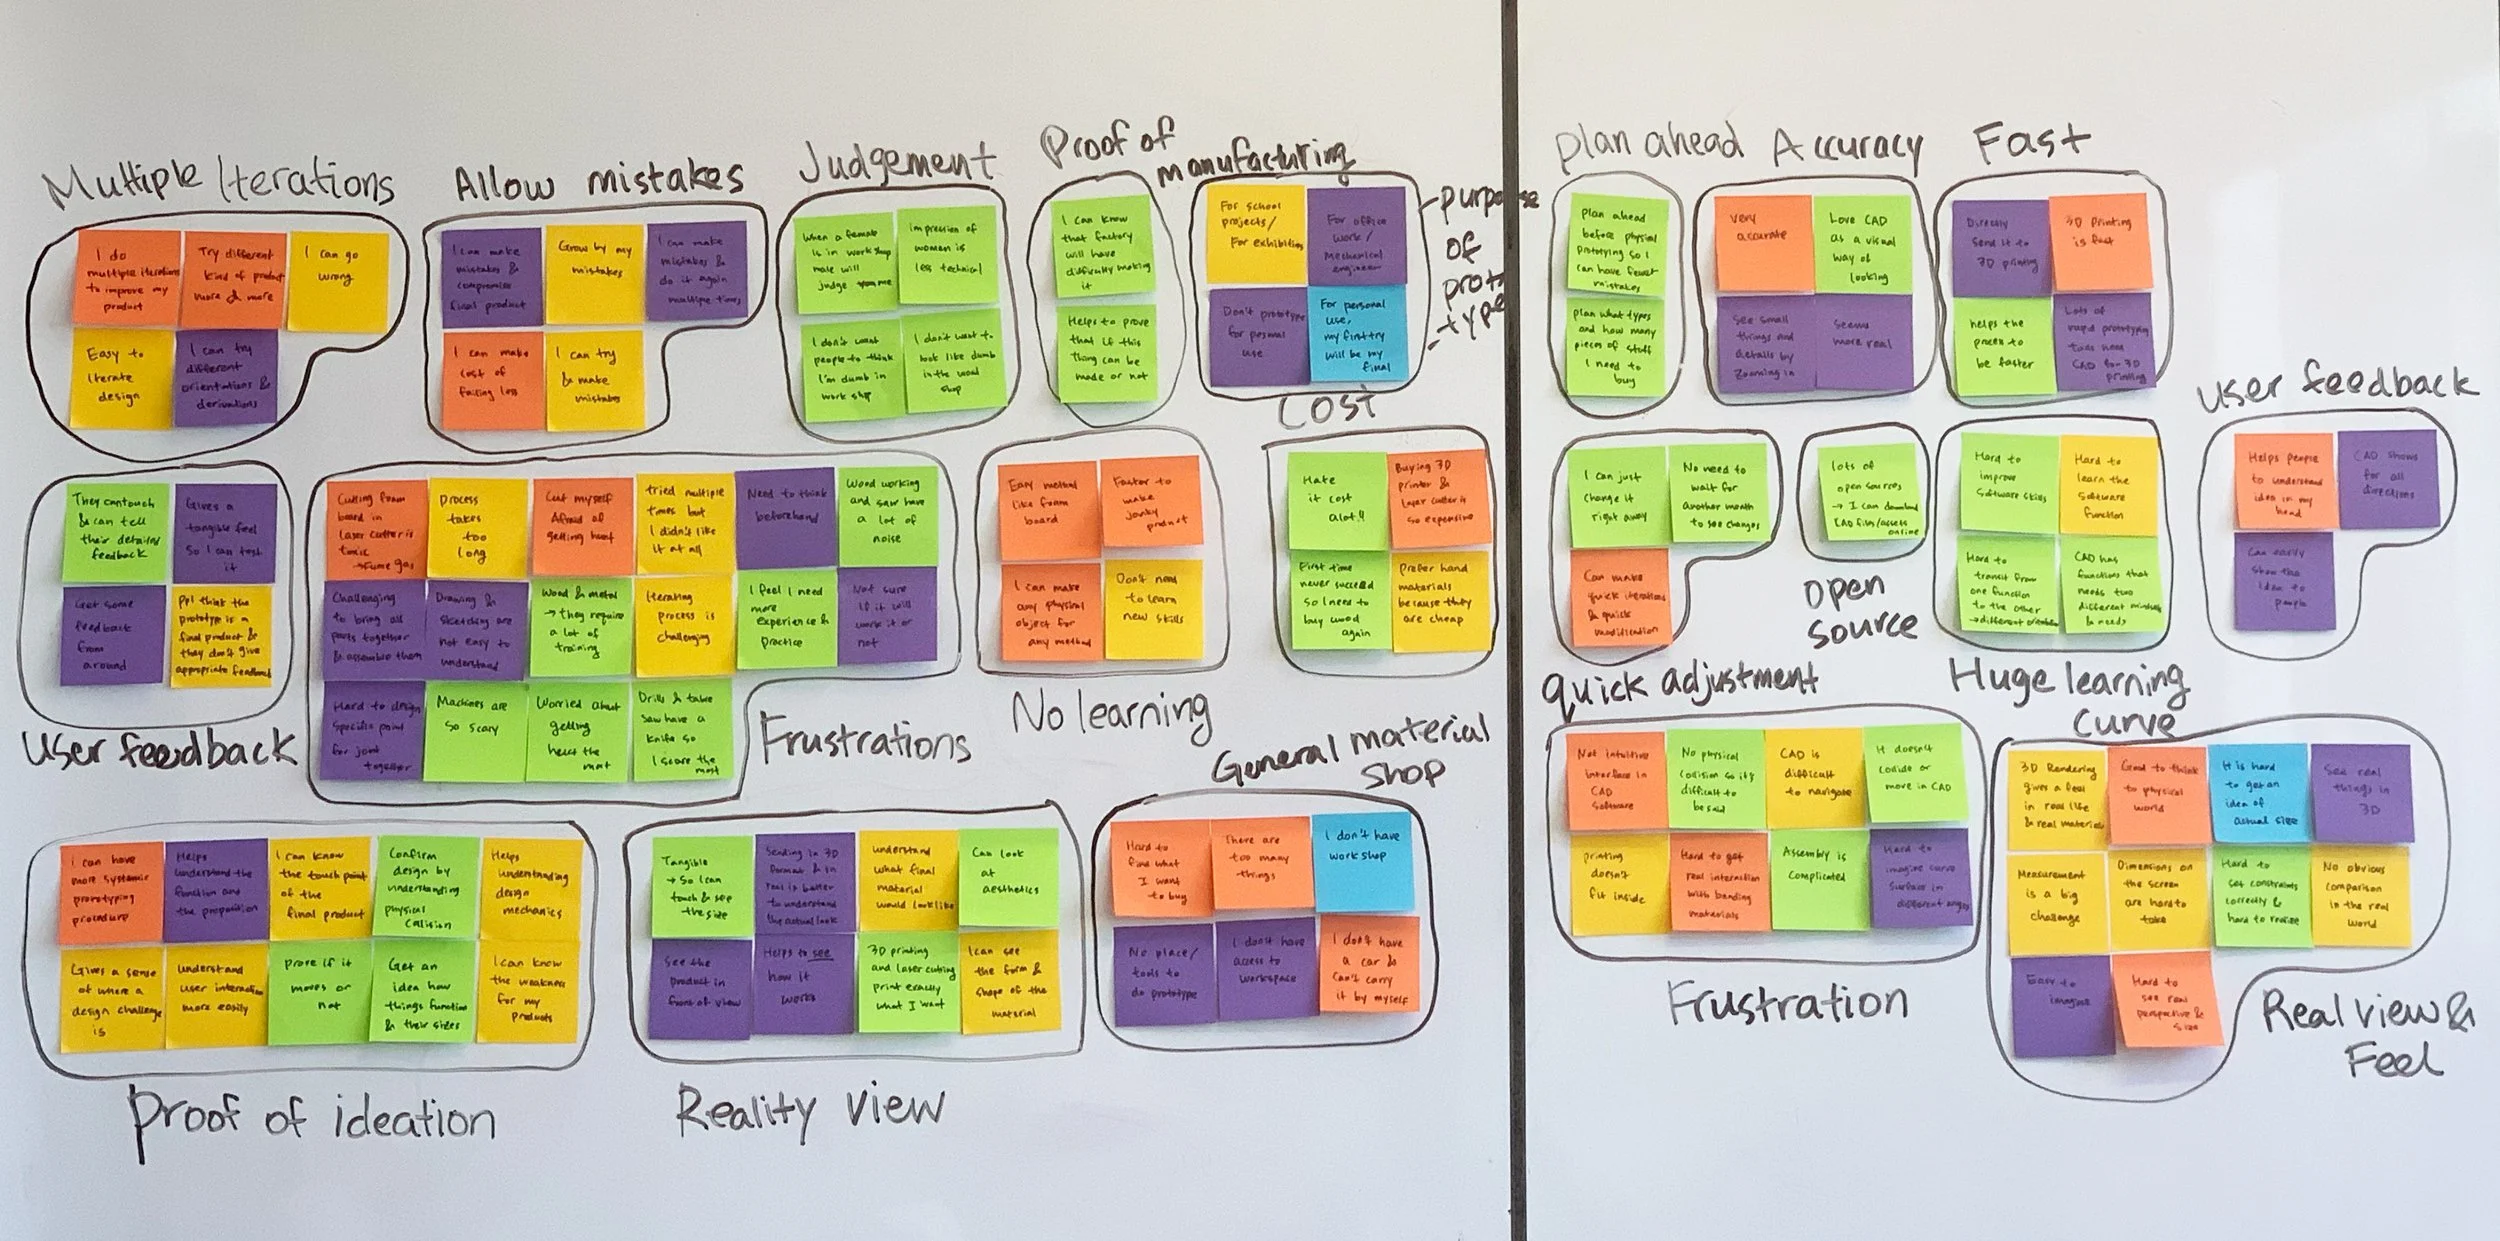
I synthesized the collected data from the interviews and competitive audit into an affinity map to help form insights and brainstorm design ideas to solve users’ higher-order problems.

SYNTHESIS

Key insights

User persona
Based on my insight and observation from the interviews, I created user personas that captured the goal of our users and their prototyping process.
Angela, a student at an engineering school.
Her goals are to make the cost of failure less and to do multiple iterations to improve her final school project.
Prototype with many hand tools like cardboard, foam board, paper, clay, etc.
“I don’t have money to buy a 3D printer or laser cutter. I prefer soft materials because they are easy to iterate design and cheap.”

Mathieu, a hobbyist with a 5-year-old child.
His goal is to create a chair for his child in the CAD model to get some feedback before he sends the order to the workshop.
Prototype with a 3D CAD tool but having a hard time imagining curve surfaces and different angles.
“I have no access to the workspace and no tools at home to iterate the design. So, my first prototype will be my final”

Journey map
The persona helped me to make a journey map highlighting the pain points and the opportunities for improvement.

Brainstorm ideas
IDEATION & SELECTION
Redefine User flow
FPO. We tackled the original design prototypes by starting from reviewing its information architecture and pin-pointing the risks and errors in the user flows. Because finances are drivers' top priorities, the updated flow prevents the app from selecting the rental before it is available to avoid incorrect charges. We mainly focused on the following part:
Conceptualization & Sketching

Low-fidelity prototype
PROTOTYPING
FPO. With the improved user flows and research insights, I created low-fidelity prototypes to improve the overall experience based on the previous refined user flows and research insights. The Low fidelity prototypes helped us take the sketches to a next level but a step before the high-fidelity mockups. Simple prototypes were of great use in identifying components for framing the design system and also to get initial feedback from the team before we stepped into concentrating on the visual design which required a mammoth effort.
User testing
TESTING
FPO We conducted expert evaluation and peer review sessions to evaluate our three designs. A set of standard questions were asked to evaluate interest in the designs. We ended up choosing the design with the highest scores – Service Center.
we conducted user testing to understand how users would interact with our prototype and their adjacent experience in student information platforms. The team was also able to understand whether the ideas presented were engaging and identify what needed to be improved.
Tasks:
1.
2.
3.
Evaluation method
Expert evaluation
10 Experts
Senior technicians
Stakeholders
Peer review
10 HCI Master’s students
Findings
1.
2.
3.
Refine & Iterate design
PROTOTYPING
FPO. Feedback. before and after
Evaluate usability & accessibility
TESTING
data. numbers
Takeaways
REFLECTION
FPO
Next steps
FPO